3. Registration#
Note
The terms motion-correction and registration are often used interchangably. Similary, non-rigid and peicewise-rigid are often used interchangably. Here, peicewise-rigid registration is the method to correct for non-rigid motion.
3.1. Overview#
We use image registration to make sure that our neuron in the first frame is in the same spatial location as in frame N throughout the time-series.
As described in the Batch-Utilities, registration can be run on your data by adding an mcorr item to the batch with parameters:
import mesmerize_core as mc

mcorr_params = {
    'main':  # this key is necessary for specifying that these are the "main" params for the algorithm
    {
        'max_shifts': (20, 20),
        'strides': [48, 48],
        'overlaps': [24, 24],
        'max_deviation_rigid': 3,
        'border_nan': 'copy',
        'pw_rigid': True,
        'gSig_filt': (2, 2)
    },
}

mc.set_raw_data_path(path/to/tiff)
df.caiman.add_item(
    algo='mcorr',
    input_movie_path=path/to/tiff,
    params=mcorr_params,
    item_name=movie_path.stem,  # filename of the movie, but can be anything
)
3.2. Registration Parameters#
Parameters for motion correction are fed into CaImAn in an object which holds and organizes parameters for registration, segmentation, deconvolution, and pre-processing steps.
As such, you can put any parameter found in that structure into the parameters dictionary. Only the parameters that apply to registration will be used.
Parameter |
Description |
|---|---|
|
Flag for allowing NaN in the boundaries. |
|
Size of kernel for high pass spatial filtering in 1p data. If |
|
Flag for 3D recordings for motion correction. |
|
Maximum deviation in pixels between rigid shifts and shifts of individual patches. |
|
Maximum shifts per dimension in pixels. (tuple of two integers) |
|
Minimum value of movie. If |
|
Number of iterations for rigid motion correction. |
|
Flag for producing a non-negative movie. |
|
Split movie every |
|
Overlap between patches in pixels in pw-rigid motion correction. (tuple of two integers) |
|
Flag for performing pw-rigid motion correction. |
|
Flag for applying shifts using cubic interpolation (otherwise FFT). |
|
Number of splits across time for pw-rigid registration. |
|
Number of splits across time for rigid registration. |
|
How often to start a new patch in pw-rigid registration. Size of each patch will be |
|
Motion field upsampling factor during FFT shifts. |
|
Flag for using a GPU. |
|
Use that to apply motion correction only on a part of the FOV. (tuple of slices) |
The most important/influencial parameters in this set are:
gSig_filt: Apply a gaussian filter, helps to make neuronal features stand out especially in noisy recordings.max_shift: Determines the maximum number of pixels that your movie will be translated in X/Y.fr: The frame rate of our movie, which is likely different than the 30Hz default.pw_rigid: Correct for non-uniform motion at different spatial locations in your recording.
A note on max_shift
For timeseries where the FOV is sparsely labeled or a frame is corrupted, the registration process of two neighboring patches can produce very different shifts, which can lead to corrupted registered frames.
We limit the largest allowed shift with the max_shift parameter.
3.2.1. gSig_filt visualization#
gSig_filt is an especially useful parameter for handling noisy datasets.
To register your movie, CaImAn needs a “template”, or a 2D image, to align each frame to. Applying a gaussian filter can help make the neurons have more contrast relative to the background.
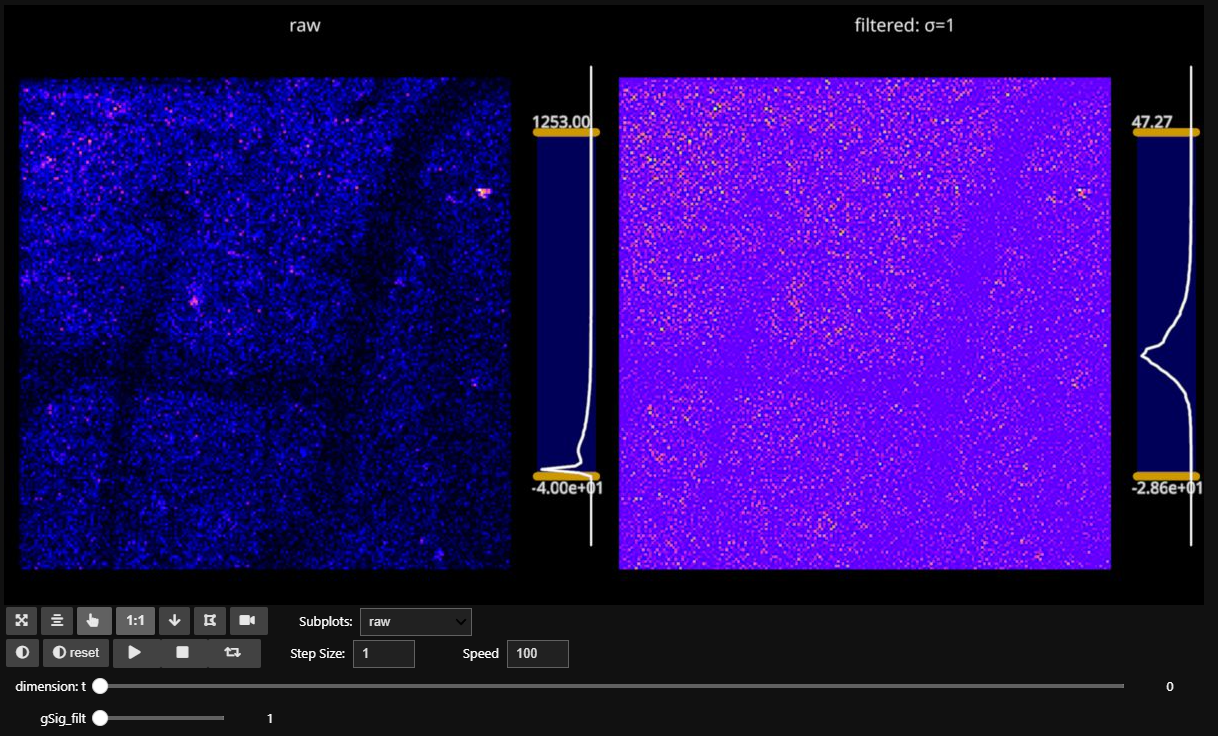
Using fastplotlib we can easily create a visualization to gather which value of gSig_filt will give our neuronal landmarks the most contrast for alignmnet.
Setting gSig_filt = (1, 1) yields the following:

Comparing the above image with gSig_filt = (2, 2):

… we can see much more clearly the neurons that will be used for alignment.
How To: Create the above visualization
## slider
from ipywidgets import IntSlider, VBox
slider_gsig_filt = IntSlider(value=3, min=1, max=33, step=1,  description="gSig_filt")

from caiman.motion_correction import high_pass_filter_space

def apply_filter(frame):
    gSig_filt = (slider_gsig_filt.value, slider_gsig_filt.value)

    # apply filter
    return high_pass_filter_space(frame, gSig_filt)

# filter shown on 2 right plots, index 1 and 2
funcs = {1:apply_filter}

iw = fpl.ImageWidget(
    data=[movie[:500], movie[:500]], # we'll apply the filter to the second movie
    frame_apply=funcs,
    figure_kwargs={"size": (1200, 600)},
    names=['raw', 'filtered'],
    cmap="gnuplot2"
)
iw.figure[0, 0].auto_scale()
iw.figure[0, 1].auto_scale()

iw.figure["filtered"].set_title(f"filtered: σ={slider_gsig_filt.value}")
iw.window_funcs = {"t": (np.mean, 3)}

def force_update(*args):
    # forces the images to update when the gSig_filt slider is moved
    iw.current_index = iw.current_index
    iw.reset_vmin_vmax()
    iw.figure["filtered"].set_title(f"filtered: σ={slider_gsig_filt.value}")

iw.reset_vmin_vmax()

slider_gsig_filt.observe(force_update, "value")

VBox([iw.show(), slider_gsig_filt])
3.3. Registration Results#
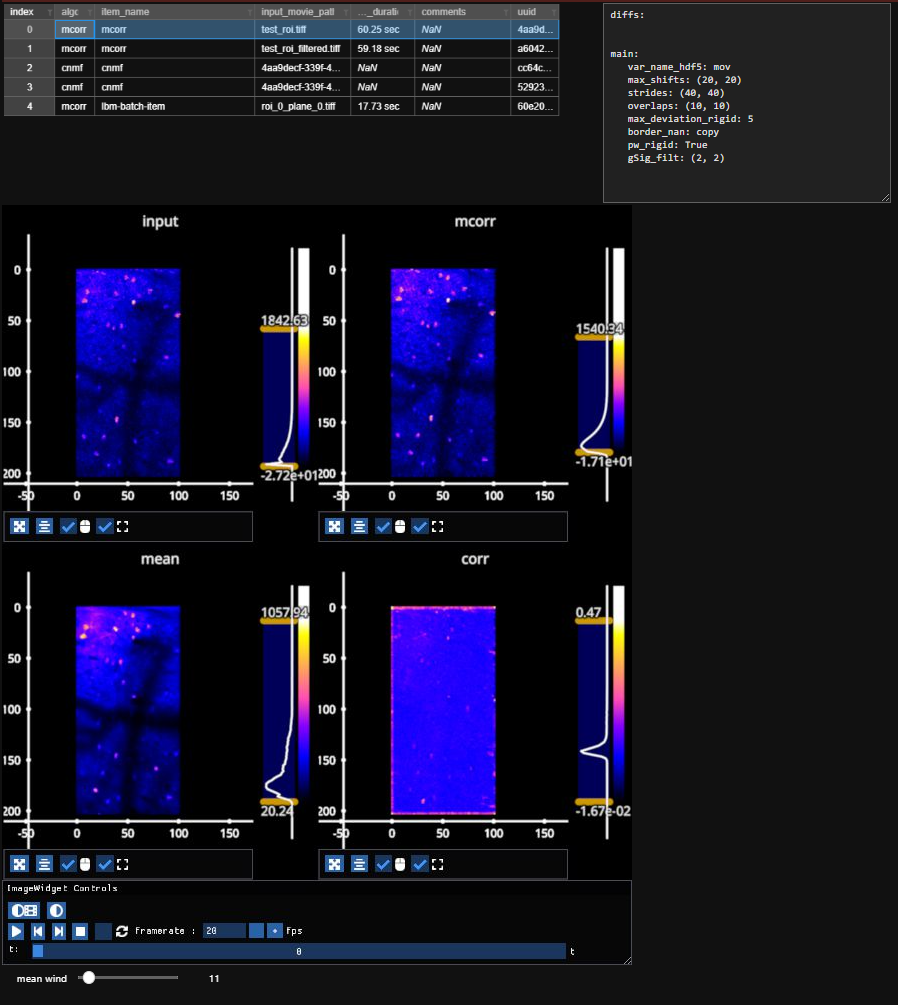
Following a registration run, results can be quickly viewed with the help of mesmerize-viz.
Important
Mesmerize-viz needs a separate install step, this will be fixed once the pull request is merged
Until then:
conda activate env git clone https://github.com/FlynnOConnell/mesmerize-viz.git cd mesmerize-viz pip install -e .
from mesmerize_viz import *

viz = df.mcorr.viz(start_index=0)
viz.show()

3.4. Summary and Metrics#
The registration process generates several key metrics that help assess the quality and accuracy of the motion-correction. These metrics provide insight into how well frames align with the template and the overall stability of the video.
3.5. Summary and Metrics#
The registration process generates several key metrics that help assess the quality and accuracy of the motion-correction. These metrics provide insight into how well frames align with the template and the overall stability of the video.
Metric |
What It Measures |
What It Means |
How It Helps You |
|---|---|---|---|
correlations |
How similar each frame is to the template frame. |
Higher values mean better alignment, while lower values suggest misalignment or noise. |
If correlations are low, it may indicate poor alignment, noise, or significant differences between the frame and the template. |
smoothness |
How “smooth” the pixel brightness is across the entire frame. |
Higher smoothness means smoother, more stable frames, while lower values indicate sharp edges, noise, or misalignment. |
Helps identify noisy or unstable frames. High smoothness suggests the frames are well-aligned and free of sudden changes in pixel brightness. |
flows |
The movement of pixels from frame to frame relative to the template. |
Large pixel movements mean the frame is shifting a lot, while smaller movements indicate better stability. |
Useful for visualizing how much each pixel moves between frames. Large movements suggest frame misalignment. |
norms |
The total amount of pixel movement in each frame relative to the template. |
High values mean the frame has shifted a lot relative to the template, while low values suggest stability. |
Tracks how much a frame shifts overall. If norms are high, it could mean misalignment or frame drift. |